I decided to try another test of Fast Play MicroBattle (FPMB).
This time I'm replaying a historical scenario. Wargames Illustrated # 204 features a scenario for the relief of Vienna in 1683. I then split it into 3 scenarios covering each flank and the center.
PART 1 - THE ALLIED LEFT FLANK
Set Up
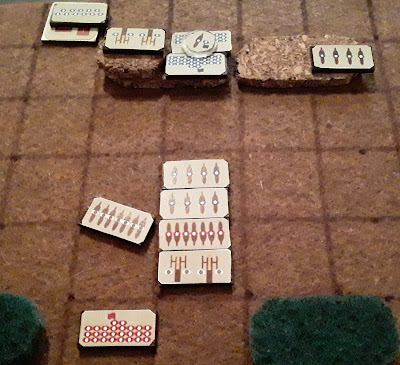
The allied Imperial and Polish forces advance from the west (bottom). The Turks defend a ridge line, with their flanks anchored on the village.
The opposing forces are:
- Turks (Ibrahim) - 2 brigades of Janissaries, 3 brigades of light cavalry, a battery of artillery, and a brigade of Azab light infantry.
- Allies (Charles of Lorraine) - 2 brigades of Cuirassier heavy cavalry, 1 brigade of Imperial musketeers, battery of artillery, 1 brigade of Polish musketeers, 1 brigade of Polish hussars
The Battle
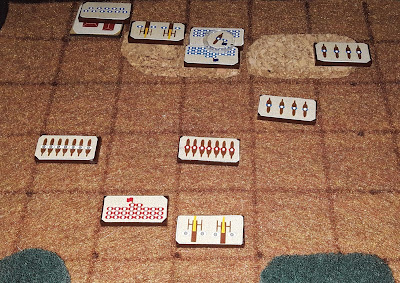
The Turkish cavalry charges from the ridge, overruns the Austrian musketeers, and kills Charles of Lorraine.The Turks are victorious on the left. Next we'll see how they do in the center.
Analysis
I was satisfied with this test.
- The game took about 20 minutes, a bit longer than my target but still reasonable.
- This time I added artillery. Rules for guns are a little different than the standard combat rules.
- Artillery may fire up to 4 squares
- Need a 5-6 to hit at short range (2 squares) or 6 at long range (3-4 squares)
- Close combat with adjacent targets follows the standard combat procedure
- If hit with a ranged bombardment, the target makes Morale and Retreat Tests at an advantage
- In this battle, the Turkish artillery was effective. The Imperial artillery, well not so much.
- By the way, you may notice that I'm using a different grid. I flipped the mat over and did a grid with 30mm squares. I ended up with a 6 x 6 grid with a column of half squares (which I don't use).


Did you play all 3 scenarios at the same time? Or was this scenario the first one chronologically? Will the following scenarios reflect the outcome of this first one? In any event, the momentum is presently with the Turks, so it’s likely to take a considerable effort by the allies if they are to achieve victory and relieve Vienna.
ReplyDeleteCheers,
Geoff
I haven't played the other scenarios yet. Sorry for making you wait.
ReplyDeleteChronologically, the fight on the Allied left and center occurred roughly concurrently. The charge of the Winged Hussars on the Allied right occurred later in the day. I simply plan to play each one consecutively. Whoever wins 2 of the 3 scenarios wins the battle.
Ok. Thanks Kevin. I was just wondering if this victory on the allied left flank would somehow impact on the battle in the centre? Say, allow the Turks to have a % chance of a flanking force arriving (now that they’ve seen off the allies on that flank). Enjoy the rest of your weekend.
ReplyDeleteCheers,
Geoff