Friday, January 31, 2014

We Have a New Record!

Actually, I set a couple of personal blogging records this month:

  • 15 posts in one month (16 if you count this post), beating out my personal best last April.
  • 4 actual battle reports (Dardona, Space Torpedo Run, Space Marines, and Balderdash Pass). I think I only played 3 miniature games all last year (although I played a lot of board games).
I don't think I'll be able to keep up that pace all year, but I hope to play miniature games more consistently this year. That being said, I don't expect to get any games in this weekend. On Saturday, I'll be doing some more "1:1 Scale Wargaming" and on Sunday I'll be working on a different kind of project - building some IKEA shelves that will be turned into cat perches.


Sunday, January 26, 2014

King of Catan

Last night was board game night; we pulled out Settlers of Catan. It was a very tight and exciting game. The final board is pictured below:


I (the white settlements) jumped out to an early lead, reaching 7 VP to 4 for my opponents. Then Jimmy (red settlements) took the title of Longest Road from me. I dropped to 5 VP to his 6 VP. I briefly took it back to get to 9 VP but when he reclaimed it we were tied 7 each (he actually had 8 at that point because he had a hidden VP from a development card). Meanwhile, Elizabeth went on a civic improvement project, building cities and reaching 6 VPs. All three of us started building like mad until Jimmy and I had 9 (1 of his was hidden) and Elizabeth had 8. Then Elizabeth rolled an 11 for the resource phase, giving me 3 bricks and 4 ore. I thought Jimmy would have the cards to build 1 more point and win, but he didn't. It then came to my turn. I was praying that I would not roll a 7 (which would cause me to drop half my cards). I didn't so I was able to build 1 final settlement to win the game.

Throughout the game, I frequently annoyed Elizabeth. On multiple occasions, I built a road or settlement where she wanted to go, blocking her progress. Then I moved the thief near one of her settlements and stole a card from her (she hates when I get competitive; when she rolls the thief she prefers to be nice and move him to the desert). Sorry honey.

For this game, I "rolled out" my new dice tray. I found a suitable box at Michael's yesterday and lined it with green felt. It worked great! I plan to stain it at some point but for now it is still usable.

Saturday, January 25, 2014

Plots and Thoughts

Some random musings:


  • As a birthday gift for myself, I ordered some Kallistra 100 Years War miniatures. They are going to form two armies from Francesia's medieval past.
  • I made some trees from a green kitchen sponge. Cheap and decent-looking except for the color, which is a very bright green. I may need to paint them. I hope to run a quick skirmish with them soon.
  • As I mentioned yesterday, there is tension in the capital of Grayrock. I'm thinking of running a revolutionary mobs in the streets scenario. I'll need a decent battle board first.
  • I played Skyrim last night and may get sucked back in today, which could put a damper on my mini gaming.

Friday, January 24, 2014

Grayrock Revolution - The Calm Before the Storm

With the Bluderians repulses from Balderdash Pass, a lull has settled on the revolution in Grayrock. The revolutionary armies are unable to get out of the Maraconi plateau (Maraconi is the little triangle in midst of the mountains) but the Bluderians cannot get in.


The Viceroy of Grayrock is waiting for reinforcements from Bluderia before his next attempt to invade Maraconi. Bluderian forces are already congregating in southeastern Grayrock. It appears that the Bluderians may try to force their way into Maraconi via the southeastern pass (the bold black line). However, this pass is perilously close to the border with Tweenwater, a Redgravian province. Already, the Redgravian military is stirring in order to resist any incursions into Tweenwater. The rumors that Redgrave is sending supplies to the rebels is merely adding fuel to the tensions.

Meanwhile, in the cities and towns of Grayrock, revolutionary sentiment is becoming manifest. The Viceroy recently banned the wearing of gray triangle patches (a representation of Grayrock mountain that has become a symbol of national pride). There is tension in the air, just waiting for a spark to set off a conflagration.

Saturday, January 18, 2014

The Revolution Saved! Battle of Balderdash Pass

As I mentioned in a post earlier today, I deviated from the Restless Revolutionaries campaign. After losing at the provincial capital, the next scenario should have been a rebel defense of the regional capital, Maraconi. I wasn't really interested in re-fighting on the Maraconi battlefield, so I devised a different scenario with the Grayrockians defending.

In this scenario, I used my adaptation of the Command & Color rules. The winner was the first to gain 5 flags. Black Bart had 8 units while Giovanni had 4. Black Bart could also win a flag by taking the exit from the Grayrockian side of the board (where Giovanni begins the game). The Grayrockians would also field militia, which would appear randomly (on a roll of infantry or crossed sabers) in woods or hills. The militia did not count as a flag if destroyed. Because of the random nature of the ambushing militia, I decided to focus my control on the Bluderians.

Here is an account from the perspective of the Bluderians.

In the aftermath of Dardona, the rebels whisked their traitorous leader to safety while his nephew Giovanni led the rear guard. General Blackwell gathered together several units of our troops, along with his vaunted Greenglade mercenaries and raced off in pursuit. Giovanni decided to make a stand in Balderdash Pass, which connected the provinces of Maraconi and Dardona. He placed his veteran infantry astride the road. In the heavily wooded and hilly terrain, General Blackwell 
suspected an ambush so we moved forward at heightened alert.

The Bluderian vanguard enters the field.
Grayrock veterans (in red and white) block the road into Maraconi.
 As the General expected, militia units tried to ambush our troops, but we brushed them aside while our right flank engaged rebel veterans.
Militia in the woods (left) opens fire
but is driven off into the hills (left)
Black Bart leads a charge on rebel militia on the hill (center)
At this point our fortunes looked bright. The General had seized the hill and we had cleared the woods on the right flank. But then fortune turned its back upon us and we suffered some severe reverses.
Accurate fire empties the saddles of the Bluderian cavalry (left).
More militia appears in the woods.
The Grayrock militia in the woods wipes out an infantry unit.
It then turns on Black Bart and his Greenglade infantry.
The militia annihilates the Greengladians.
Black Bart is severely wounded and out of the fight!
 The surprise attack by the militia scattered the Greengladians. General Blackwell was severely wounded, and his aides were just able to manage his escape from the clutches of the rebels. Our cavalry exacted revenge on the militia [albeit at great cost].

Bluderian cavalry scatters the militia
 Brigadier Crawley took charge of the situation and brought forth the Bluderian infantry to assault the rebels' left flank. Giovanni rushed to the scene to lead the defense.
Wave 1
And another
And another.
One unit of rebel veterans was destroyed but another took its place.
 We threw all our might upon their flank but their defense was stubborn and our losses were high. Finally, we forced them out of the wood.
 
The wood is cleared.
Giovanni has 1 unit to hold off 3 Bluderians (all blooded, though).
 We made one final, valiant push into the wood toward the road. As we emerged from the dense foliage, we could here the command "FIRE!" from the enemy line. A hail of musket balls swept our ranks, and then with a howl the rebels charged us [The rebels caused 3 casualties in 1 shot]. Before we knew what hit us, our ranks were scattered. There was no choice but to retreat.

The final assault is swept away.
Fortunately, the rebels were badly blooded as well, so they were in no position to pursue and we made good our retreat.

At this point, the Grayrocks had secured 5 flags (4 units destroyed + Black Bart put out of action). They had lost 3 flags, but if the Bluderians had defeated the last unit and taken the road, then they would have won. All in all, an interesting fight. At first, it seemed like it would be a cake walk for the Bluderians as the militia seemed reluctant to appear (I failed to roll infantry or crossed sabers). When the single militia unit took out 2 infantry units and Black Bart, it seemed over for the Bluderians. Nevertheless, they regrouped and made a determined assault on the Grayrock veterans. At this point, luck turned against them during activation - I kept getting just 1 infantry unit activated per turn. A combined assault probably would have won the day. Such is the fortunes of war.

One last point on activation. When coming up with the rules, I forgot to decide when leaders could be activated. At first, I thought it would be crossed sabers, but that seemed very limiting. As the game progressed, I decided that the generals would always activate (and they could also always activate any unit they were with). This made the loss of Black Bart especially painful to the Bluderians. It is a rule I may well keep.


While I'm thinking about games . . .

and my birthday is approaching, here is a wish list

Thoughts on the Francesia Project

I played another battle of the Grayrock Revolution this morning and wanted to jot down a few thoughts while they are fresh in my mind. I'll post a battle report once I get around to downloading the photos.

Terrain

  • Mountains - The scenario involved a forced passage through a mountain pass, so I needed some mountains. I thought about making them out of blocks of foam, but I don't have any handy and I was eager to play. Instead, I used some spare cork to make extra levels to add to my hills. I think they worked out nice (you'll have to check out the battle report to see them).
  • Buildings - I really like the Village in a Bag buildings. It creates a nice "toy" feel that fits with the Risk soldiers.
  • Trees - I really need some trees, although the Village in a Bag ones are growing on me because they don't take a lot of room in the space. I still would like to replace them with something more tree-like but still with the "toy" vibe.
Miniatures
  • I'm sure that there are hardcore miniature wargamers who will scoff at me, but I like using the Risk minis. I'm toying with the idea of giving them very simple paint jobs (e.g. flesh on the soldiers, horses, and guns) but I have no qualms about using them unpainted. From a distance, they look very colorful.
Command and Colors Dice
  • Picking up the C&C dice was a good investment. It really speeds up combat because it is immediately obvious if hits are made.
  • The dice also worked for unit activation. In this battle, each side rolled 4 dice to activate units. Infantry, cavalry, and artillery symbols obviously activated 1 unit of the respective symbol. Crossed sabers allow the player to choose.
  • I added a little twist to unit activation. Previously, I mentioned that I was unsure what to do with the flag symbol. I also wanted a way to allow infantry to move an extra space (a forced march). I solved both problems by combining them. A flag symbol allowed the side to move 1 of its activated units an extra space. However, that unit was not allowed to engage in combat. It worked out well. There were many times when a side could not use the flag (I either wanted a unit to engage in combat or a unit I wanted to force march did not get the die roll to be activated) so it was not overpowered but it did come in handy at times.
  • I want to get or make a nice dice tray for rolling my dice. Today, I was using a box from a case of cat food. It worked but it wasn't pretty.
The Revolution
  • I may have been unfair to the Bluderians. They were forcing a mountain pass held by a small force of veteran Grayrockians. However, rebel militia could pop up randomly to ambush the Bluderians. The militia did not count to the Bluderian flag total (in this scenario the Bluderians earned flags by eliminating Grayrockian veterans or by securing the road out of the pass). In the future, I may allot 1 flag per 2 militia eliminated.
  • In one sense, the Bluderians were fortunate because the militia did not arrive in the numbers I expected. Ah well, the tides of war.
  • I have deviated from Bob Cordery's Restless Revolutionaries campaign. After the Grayrockian defeat at Dardona, battle should have shifted back to the regional capital of Maraconi. I did not relish the idea of fighting over the same battlefield so I decided that the Grayrockians would make a stand in a mountain pass (one of the benefits of playing solo is that you can change the rules on the fly even if it is unfair to one side).
  • What next? SPOILER ALERT! With the Grayrockians holding the pass, it seems that the revolution is in a stalemate. So where does it go from here? The Restless Revolutionaries campaign doesn't really help, but I have some ideas to make things interesting. Wait and see.

Saturday, January 11, 2014

Serried Ranks and Fortune's Bones

I've been doing some thinking about my Francesian armies (using Risk figures). I compared the two battles I fought using those figures:

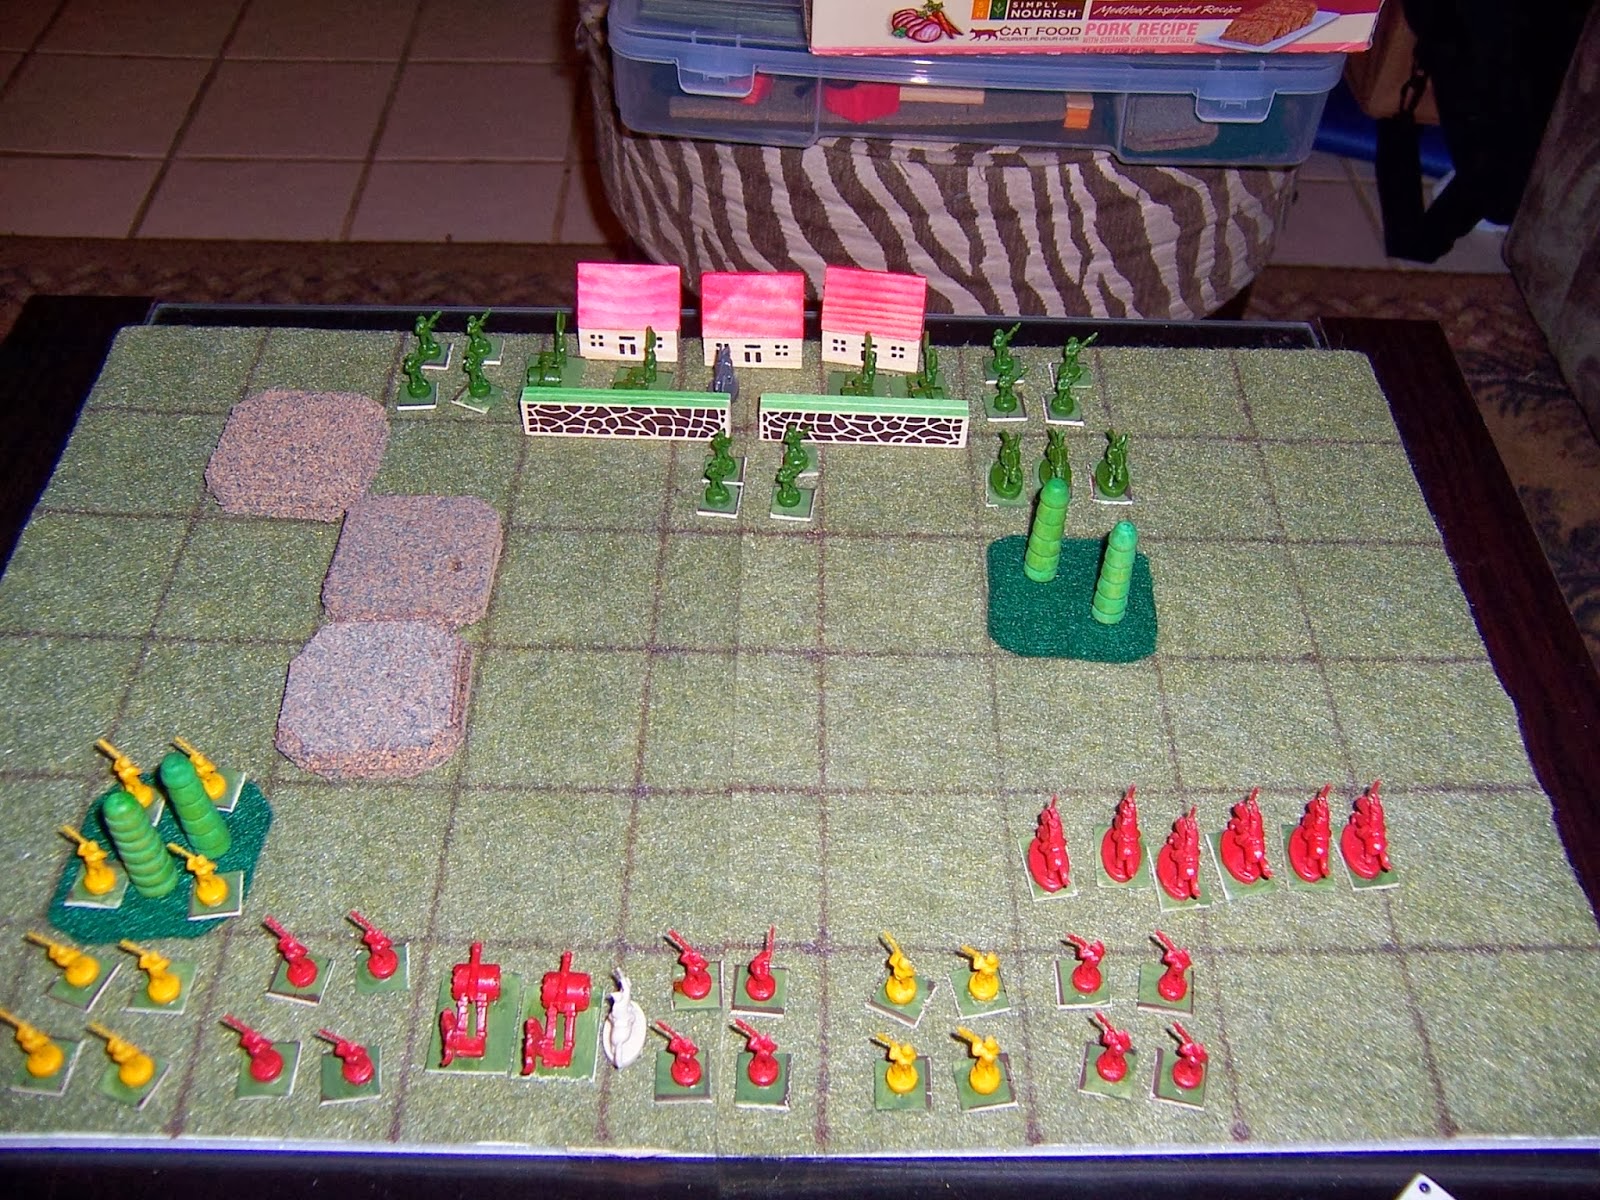
Battle of Maraconi - infantry based on 3-figure stands (2 stands per unit)
Battle of Maraconi
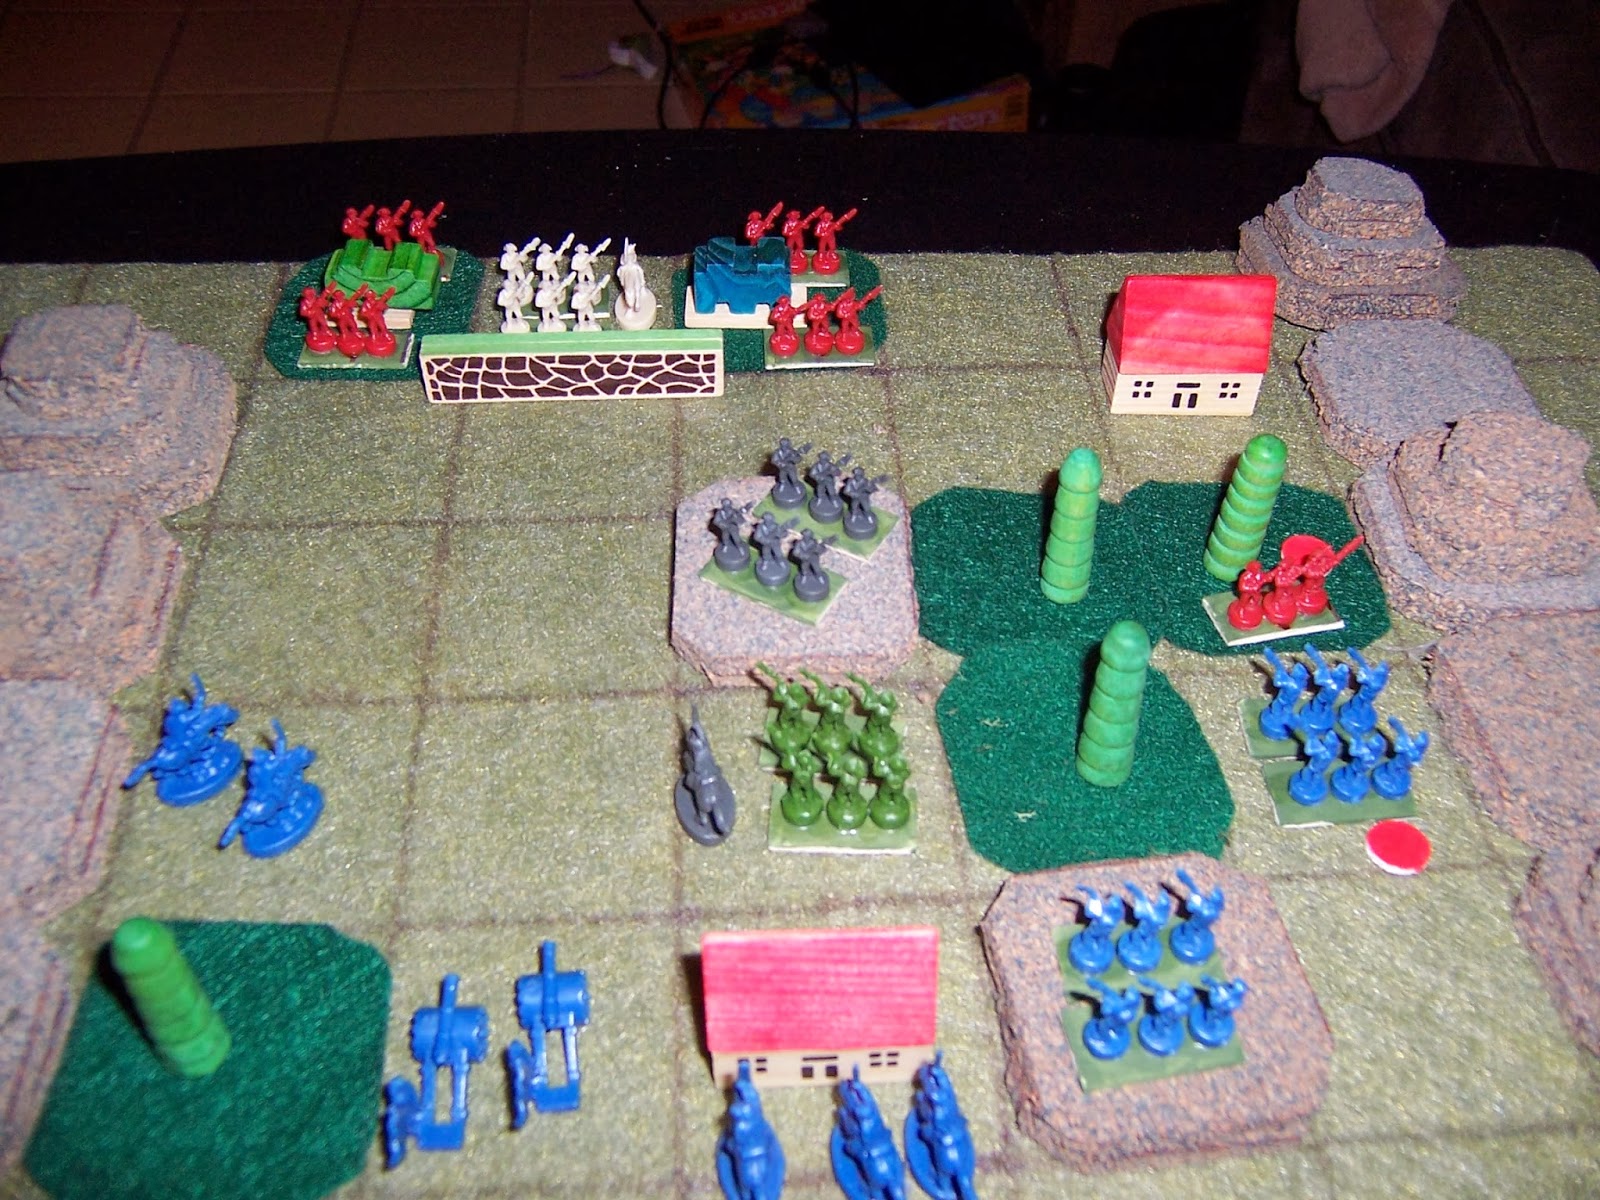
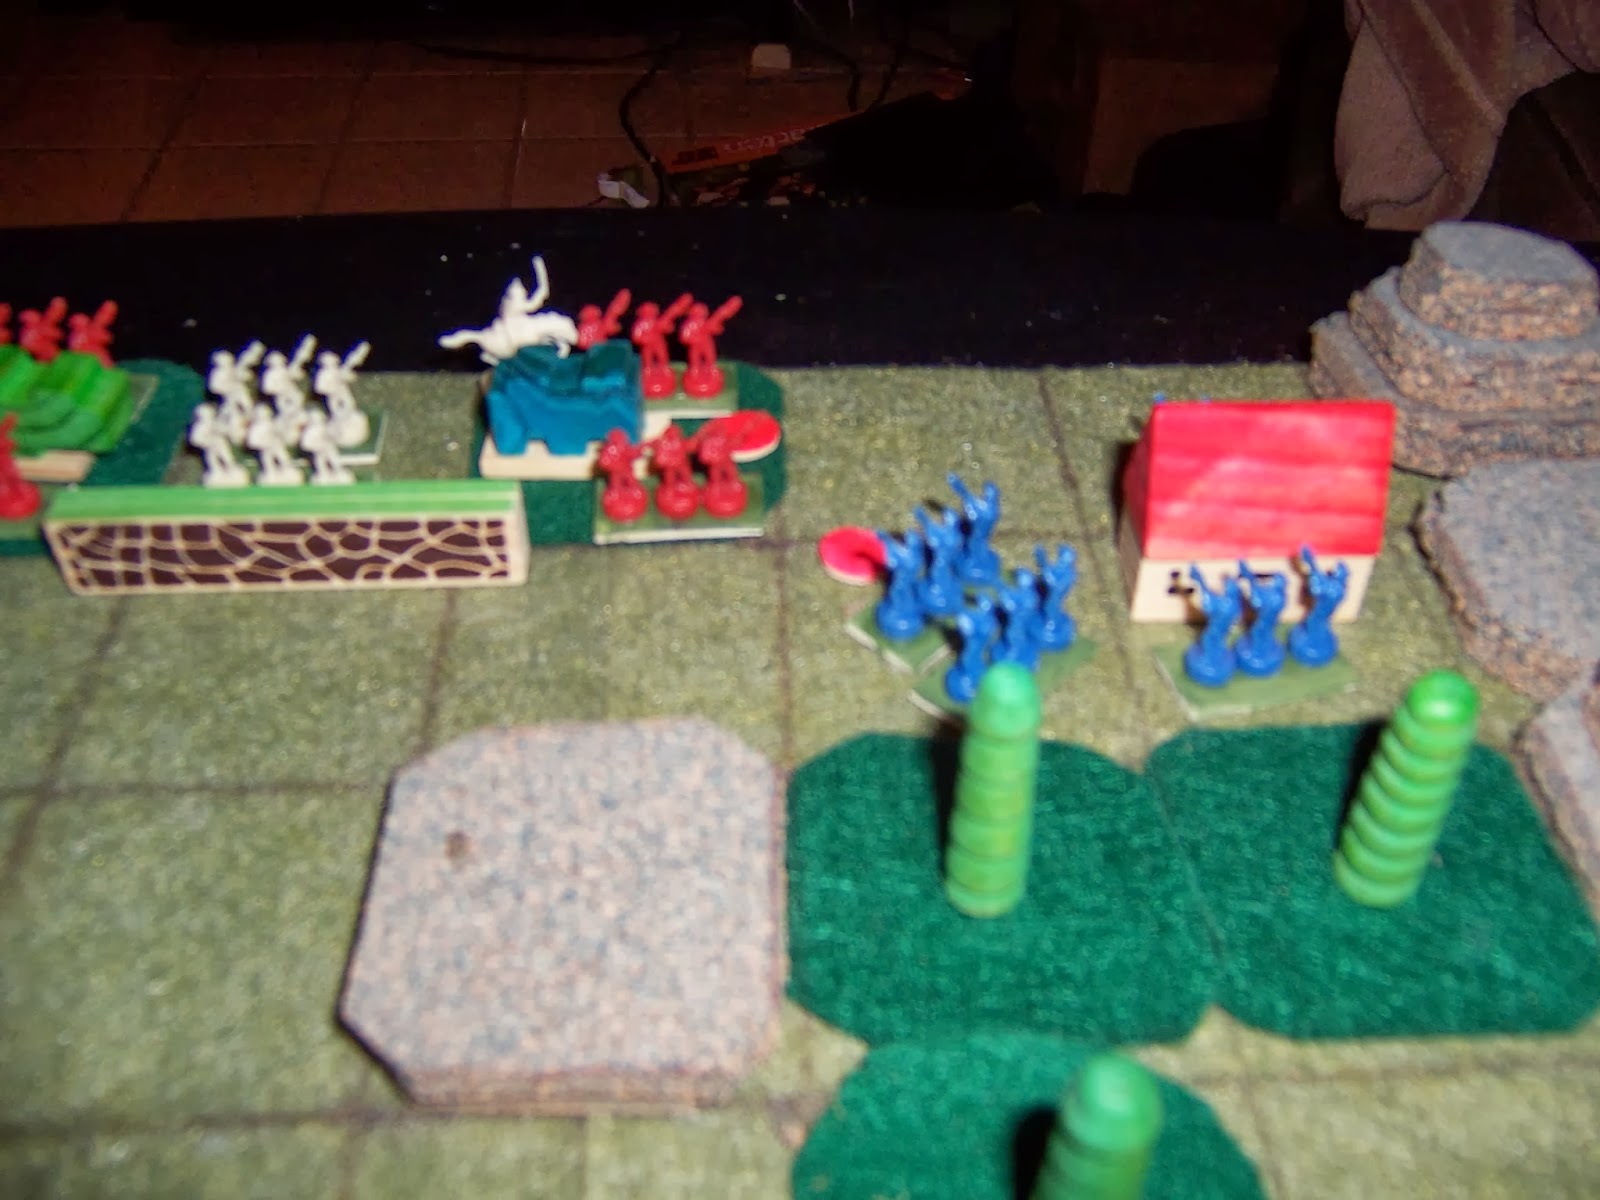
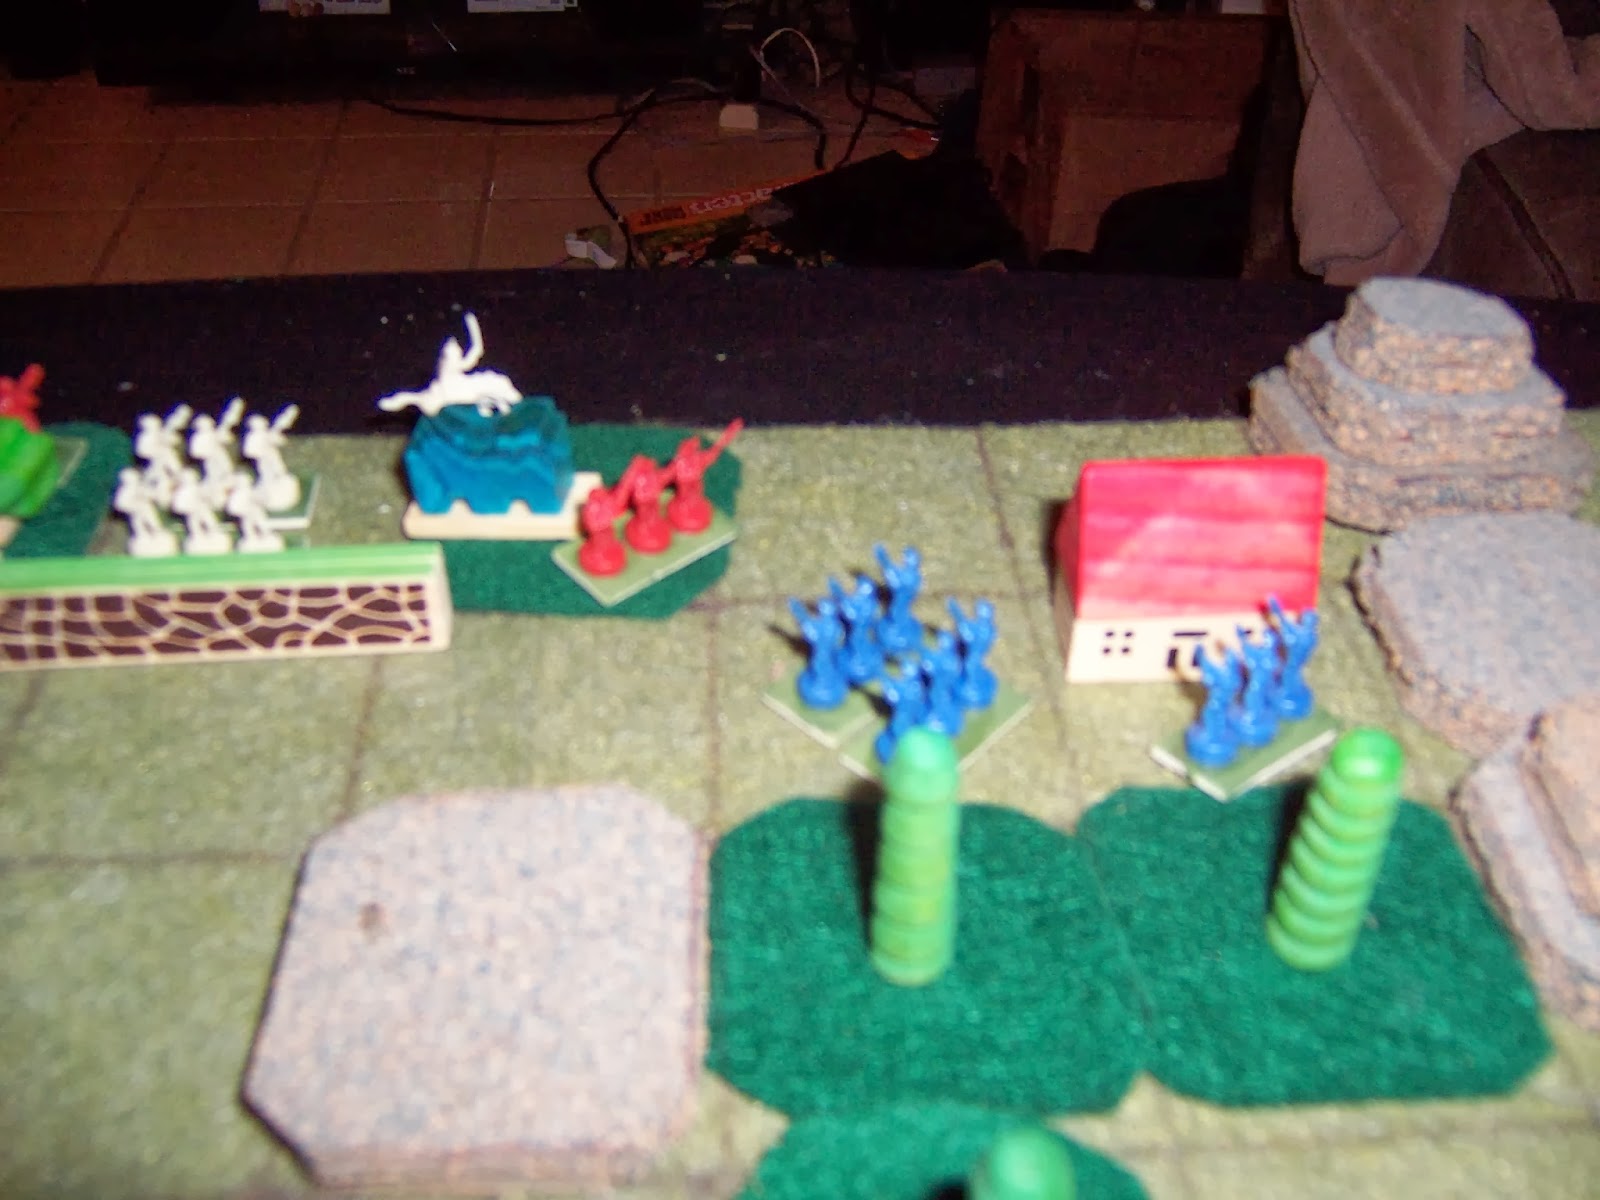
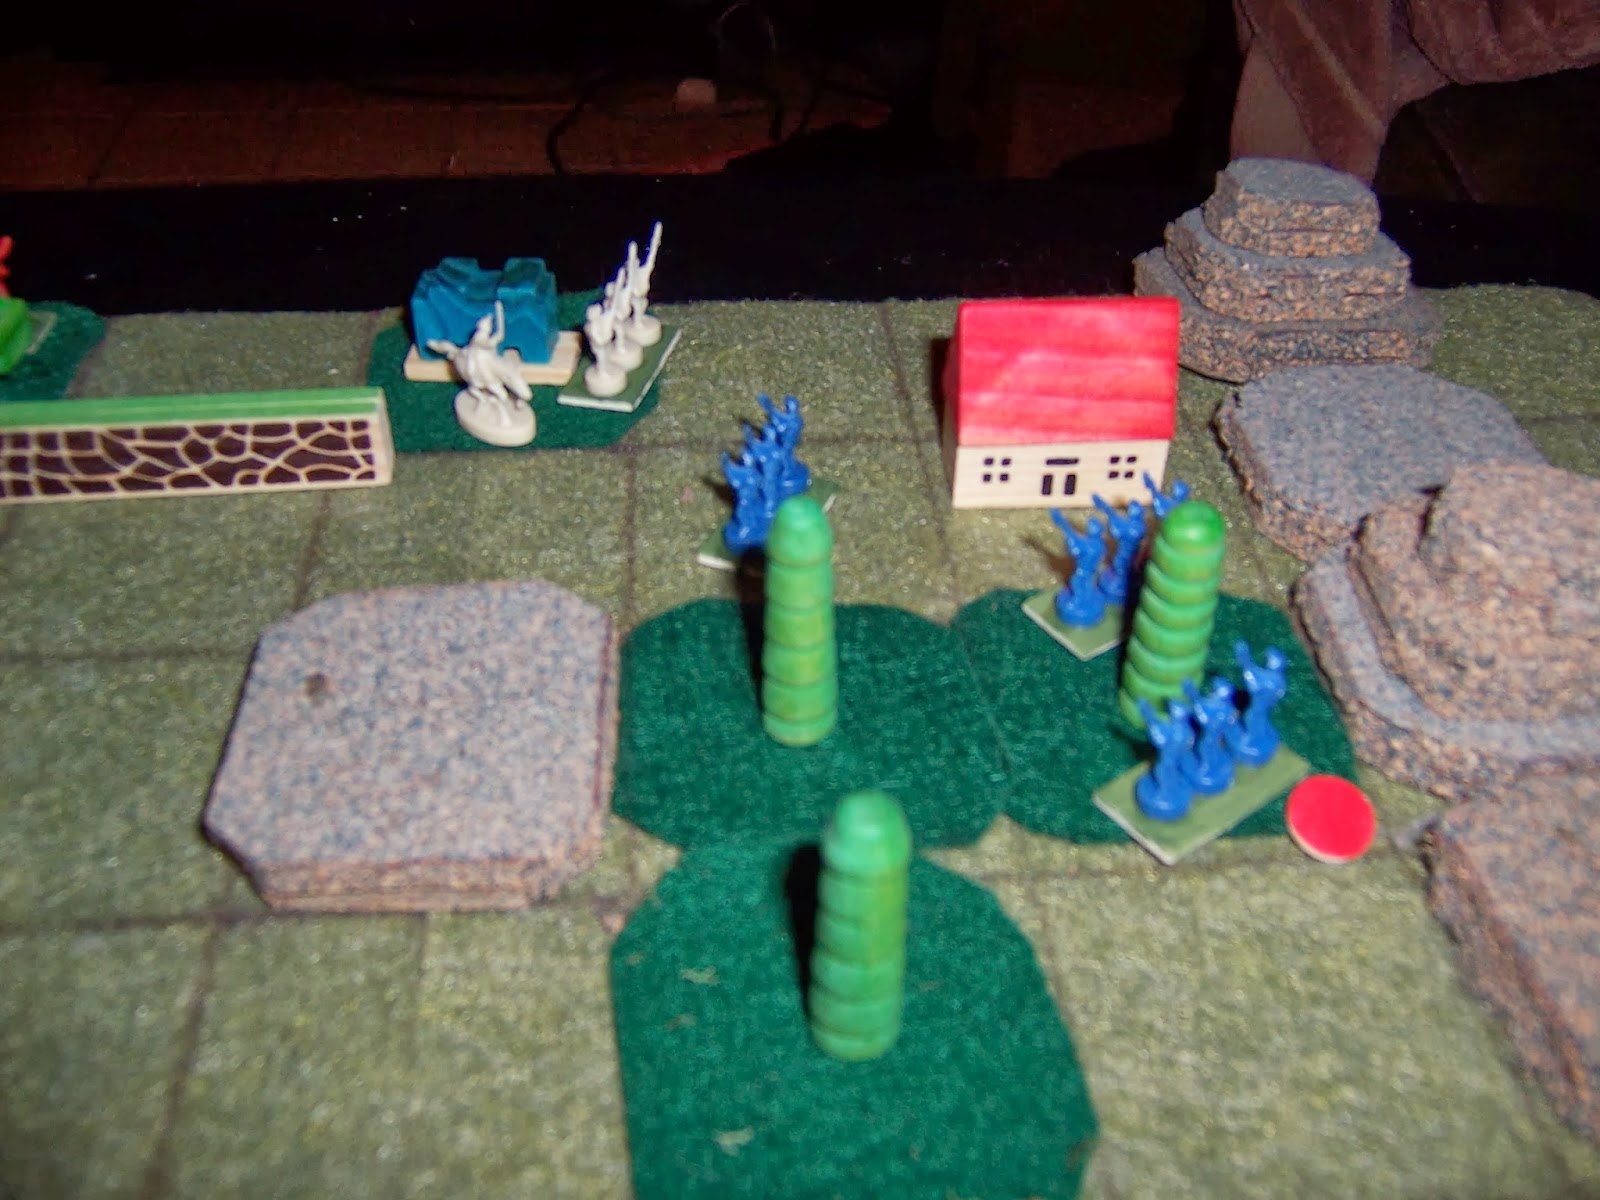
Battle of Dardona - infantry based individually
Battle of Dardona
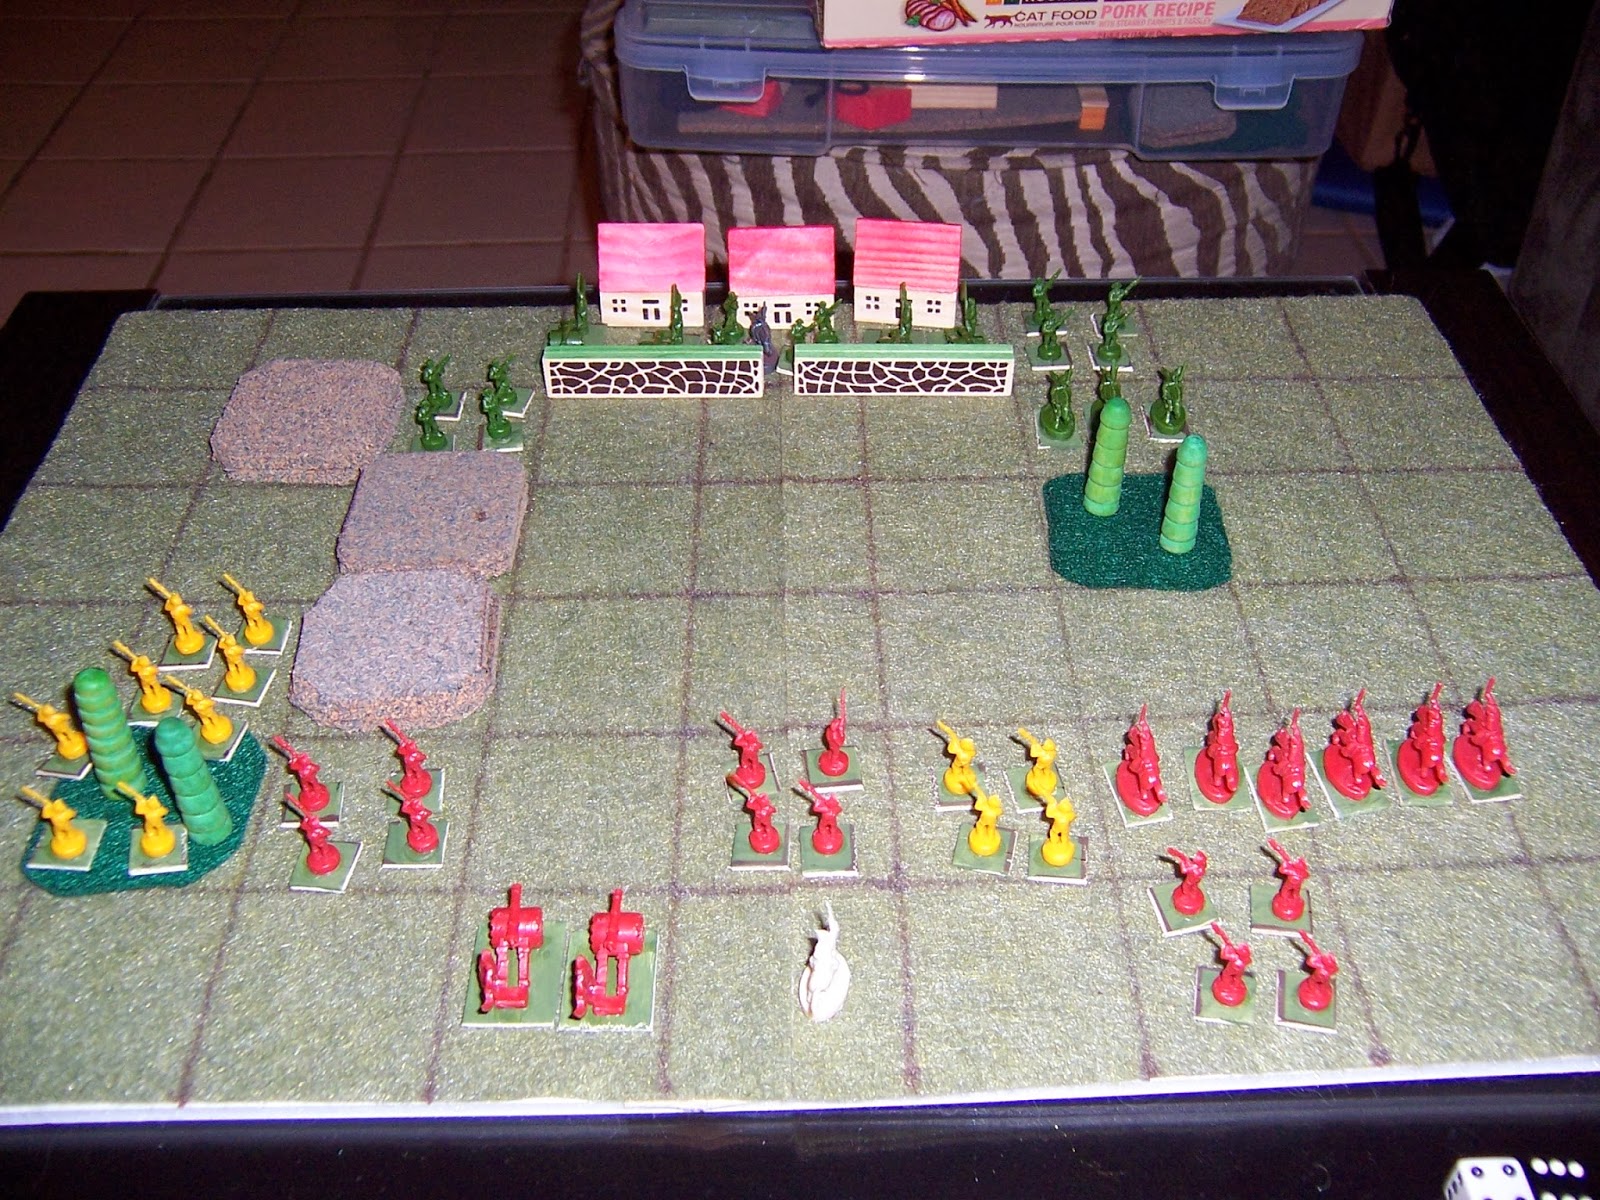
I decided I preferred the infantry on bases. They look more like well-drilled units rather than a mob of men. This morning, I re-based a bunch of my infantry as seen below. I even re-based the blue and gray troops used in the Battle of Maraconi. I hated the bright green paint I used on their original stands so I moved them onto bases with a nicer shade of green (which blends well with my battle board, as you can see in the pictures of Dardona).

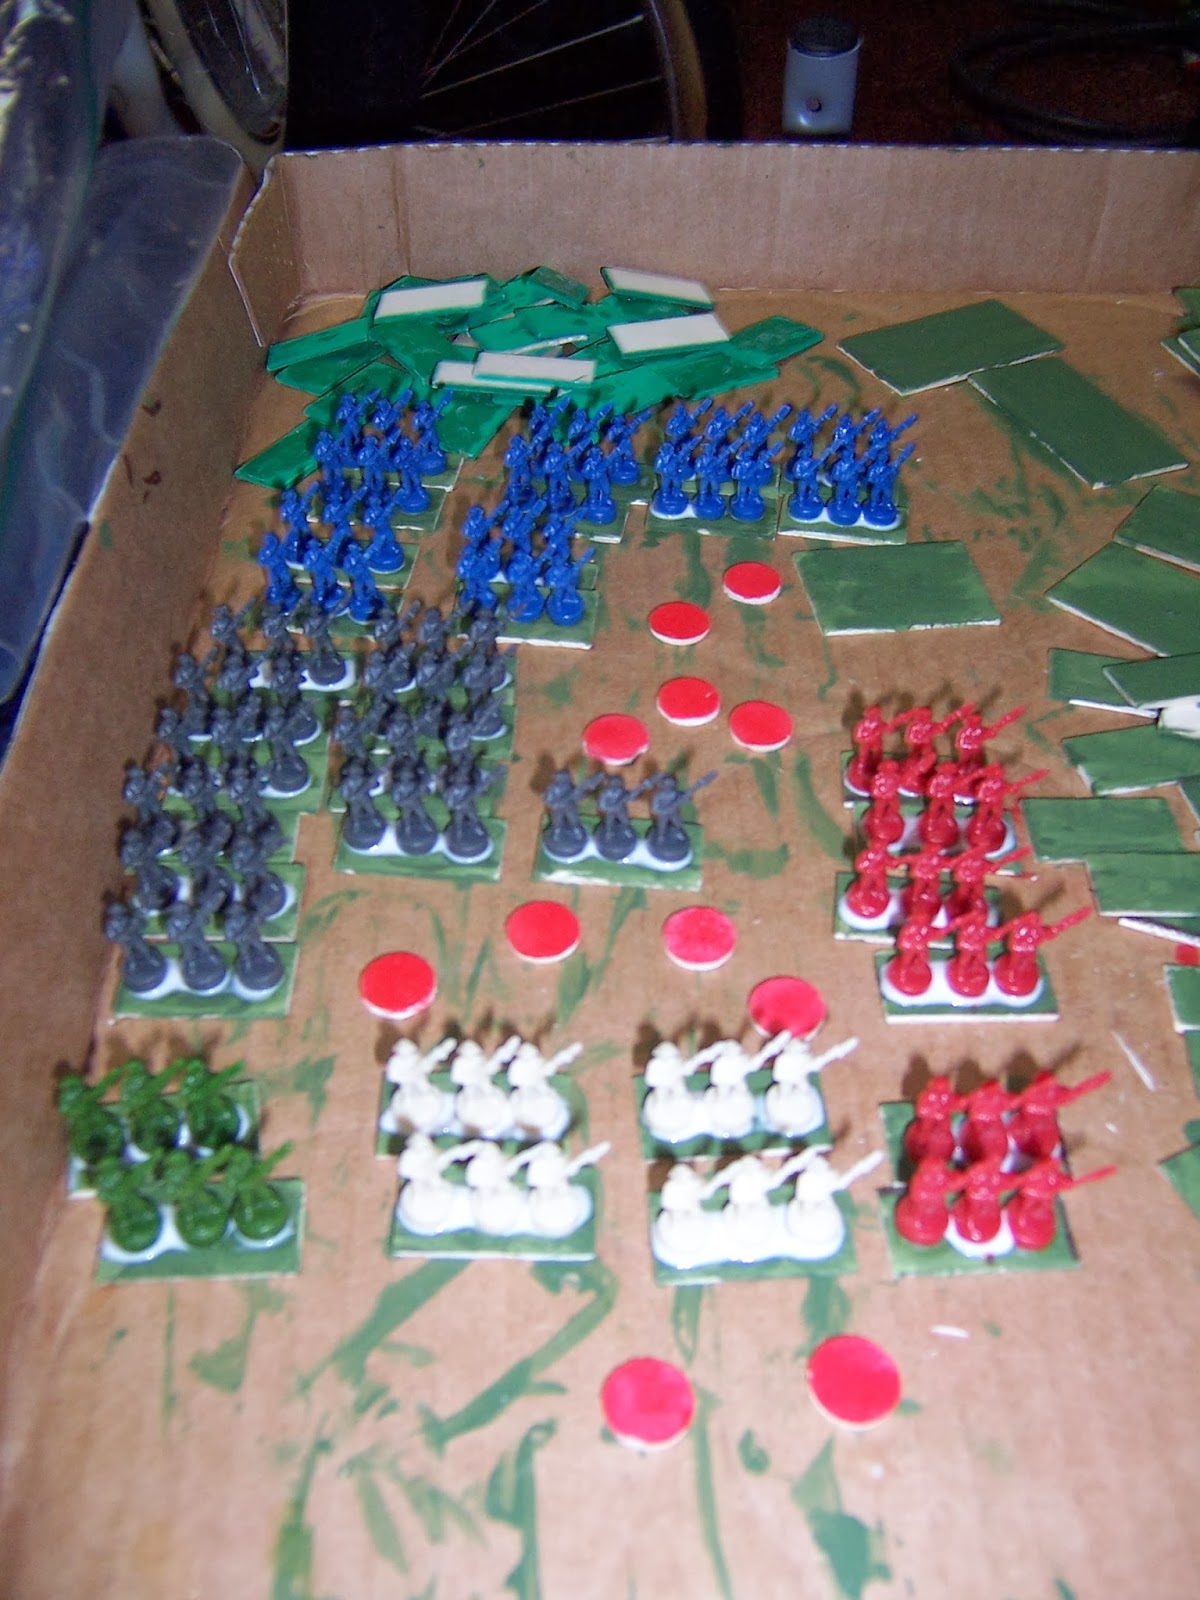
My newly-based, serried ranks of Risk figures
 The only issue using the stands is that in my Command and Colors inspired rules infantry units can take 4 hits but I cannot really fit 4 stands into a square. My plan is to use hit markers for single hits and then remove a stand on the 2nd hit. I painted some wood circles red to serve as hit markers for now. Eventually, I want to upgrade to proper casualty markers. Cavalry and artillery will be individually based so they won't need hit markers; I'll just remove a figure with each hit.

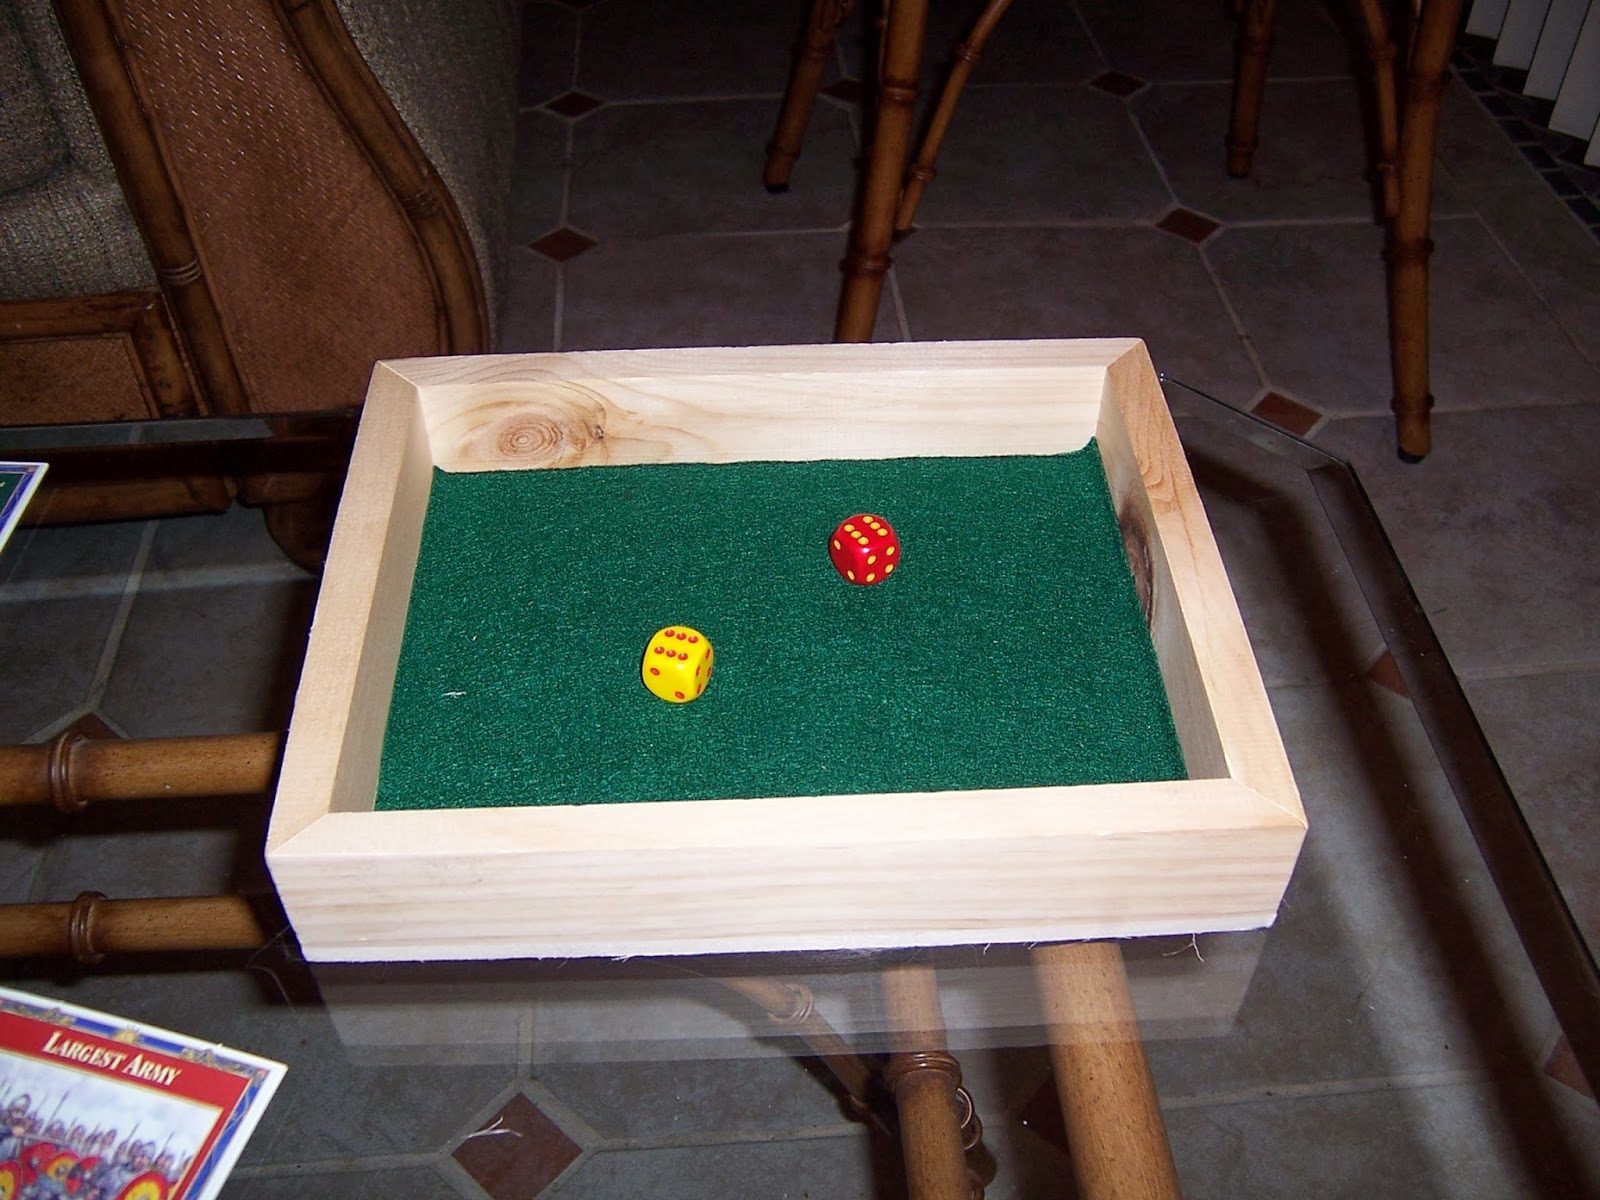
I also received a purchase this week. Now that I am using the Command and Colors combat rules it makes sense to get C&C dice. The set below is from a company called Valley Games, which makes custom wood dice for the C&C: Napoleonics game (thanks to Bob Cordery's Wargames Miscellany for the tip). Valley Games was out of stock when I checked, but I found some on eBay.
Bones of Fortune - Command & Colors: Napoleonic dice
I am also planning to use them for unit activation. Rolling infantry, cavalry, or artillery will allow you to move one unit of that type. Crossed sabers is a wildcard (activate any). I may use the flag as a wildcard as well or it could just mean no unit activated. Each turn, a side will roll 3-5 dice depending on the quality of its commander.

I am looking forward to using these toys for the next battle of the Grayrock Revolution. I have the scenario in mind, I just need to set it up and fight.

Thursday, January 9, 2014

My Miniatures History

As I ponder my next purchase for my Francesia campaign, it dawned on me how my miniatures collection has changed over time. Here’s a run-down.
  • 1/72 (20mm) plastic – I began my miniatures gaming career with 2 boxes of ESCI French and British Napoleonic infantry for use with the Complete Brigadier rules. I don’t think they ever saw battle.
  • 15mm – I didn’t like how long it took me to paint the 20mm figures so I tried going down a scale. I picked up some 15mm American Revolution Brits. I never managed to paint their foes so they never made it to the battlefield.
  • 10mm – I then picked up some American Civil War figures in 10mm. I managed to finish 2 down-scaled armies (infantry units were 8 figures) and play some games before other periods and scales drew my attention.
  • 5mm – I then went on a 5mm Heroics and Ros kick, and painted up small armies for the following:
    • Seven Year’s War Austrians and Prussians
    • Ancient Romans, Gauls, and Carthaginians
    • Vikings and Saxons
    • WWII Americans and Germans
I played numerous battles with these figures. I ran a 1730s Italy campaign where my Prussians stood in for Spanish (and the Spanish drove the Austrians out of Italy). De BellisAntiquitatis battles raged on my boards and American forces drove inland after the landing at Normandy.

Eventually, due to space considerations, I decided I wanted to go small so I sold off my 5mm collection. I rather regret it now; I’d really like to have those figures back.
  • 2mm – I picked up these up from Irregular because I was moving into a place with lack of storage space. I needed miniatures (and associated terrain, etc.) that would fit into a small space, and 2mm worked for that purpose. Nevertheless, there are other reasons why I liked 2mm:
    • figure scale is much closer to the ground scale, so games look more like battles with masses of men rather than skirmishes.
    • En masse, they really look great (although I never managed to get that many painted up).
    • Uniform details are not really visible so it's easier to create generic armies. For example, I had generic blue and red horse and musket armies, which could do duty as American Revolution Americans vs. British or Napoleonic French vs. British (or Francesia's Bluederians vs. Redgravians).
As my eyes get worse, 2mm is losing a bit of its attraction. Furthermore, as I focus on my imagi-nations, I can mix and match from different periods without worrying about historical accuracy.
  • 15mm - When I decided to resurrect Francesia last year, I decided to go with 15mm from Irregular. It was also my pick for my medieval project. Alas, I never got far with those figures. I had more success with my 15mm Space Marines project, using figures from Rebel Minis and Khurasan.
  • 10mm - I picked up some Risk figures to use as a short-term fill-in for my Francesian armies, but now I've decided to go full steam using these figures. Several years ago, I picked up some N-gauge Historifigs samples for a Battle Cry variant but never really did anything with them. I may use Historifigs to supplement my Risk armies.
So this is where I stand today - with some 2mm armies, 15mm sci-fi (plus a couple of abandoned 15mm projects), and a 10mm/N-gauge horse and musket project.

Sunday, January 5, 2014

Space Marines in Action!

I finally finished painting the Space Marines for a not-Space Hulk expedition to a floating derelict so we played a game last night.

The teams have been tasked with making their way to the central control room, downloading the computer log, setting the self-destruct, and then getting out of there! I don't have full details of the game, but I snapped a few pictures.

The carnage in one room. Two Space Demons take out 2 members of my squad.

Lousy photo of Elizabeth's Black Widow team (from Rebel Minis).
4 of 5 were wounded.
Elizabeth really likes her Black Widow team. I painted each with a different hair color. She really liked the one with blue hair and made that her squad leader. They just need a heavy weapons specialist.

Jimmy's victorious Red Squad.
1 man lost.
I need to tweak the rules a bit, but we had a fun night shooting aliens.

Saturday, January 4, 2014

Aquians Attack (Part 2) - Torpedo Run

As I mentioned yesterday, I jotted down some rules for a torpedo run game. This morning, I was fired up to try the game, but I did not have a carrier. I attempted to build a simple one using cardboard, but the attempt did not go well. I still wanted to play, so I grabbed a substitute.

A Wii remote does duty as the Federation Carrier Scheherazade
 I previously reported a sneak attack on the Blue Genies' carrier by a small Aquian strike force. Despite the efforts of Lts. Ray Gunn and Ty Rowe, the Aquian torpedo boat slipped past the defenses into torpedo range.

The attacker had sustained damage during the earlier action but I had neglected to keep the record. Therefore, I rolled twice on the damage chart before beginning the game. The TB suffered hits to the hull and engine.

Here is an account of the torpedo run from the perspective of the Scheherazade.

When the Aquian torpedo boat (TB) reached anti-fighter battery range, our guns opened up, but they failed to hit the target. As the TB closed, it launched one of its torpedoes.

The Aquian launches its first torpedo (at range 5)

The TB continued to approach, but our batteries turned their focus in an attempt to destroy the torpedo. Defensive fire failed and the torpedo struck a glancing blow on the hull. Damage was fortunately minor.
The torpedo strikes!
 Notes:

  • I don't have a provision for anti-torpedo fire in the rules. Instead it is abstracted in the torpedo hit table.
  • I added a step to the turn sequence. Torpedoes are not resolved in the turn they are launched but in the following turn. This adds a little suspense as the attacker must decide whether to continue his run before the torpedo strikes.

Anti-fighter fire continued, again unsuccessfully. The enemy closed and launched his second torpedo.

Another torpedo away!
 At this point, the enemy turned to flee. Finally, our batteries found their aim. A shot struck and destroyed the TB's engines. The enemy sat dead in space. But at this point, the second torpedo struck, rocking the Scheherazade. Flames erupted from her hull. The fire-teams managed to control the blaze, but the ship suffered damage that will require a stint in space dock.

The enemy is crippled but the carrier suffers serious damage
Note: I added a segment to the game where the attacker has to escape. In this case, the TB suffered a second engine hit which left it without power before it could get our of anti-fighter range.

With the Scheherazade damaged, the advantage now lies with the Aquians. We expect a major offensive shortly and are in need of reinforcements.

All in all, the game holds some promise. I think I need to add more anti-fighter fire (perhaps 2 rolls per turn instead of 1) but I'm worried that it will be too much. Looks like I have some experimenting to do.

Friday, January 3, 2014

Space Battle Torpedo Run

About a month ago, I posted a battle report about a sneak attack on the Blue Genies' carrier. The attacking torpedo boat managed to slip by the defenders, Ray Gunn and Ty Rowe, but I have not yet determined if its attack got through. Two factors have kept me from finishing the game:

1. What rules to use?
I wanted an interesting game with some room for decisions instead of just dice rolls. At the time, nothing came to mind, but I just came up with an idea that just might work.

The attacking torpedo boat (TB) begins 6 spaces from the target. Each turn, the TB may move 1 space closer but it risks defensive fire from the carrier. In any space, the TB may launch one or both of its torpedoes. The probability of the torpedo hitting the carrier increases as the range decreases.

This will create an interesting conundrum. Does the TB fire its torpedoes from a distance and hope for a hit or does it close on the target but risk getting destroyed?

Here is a draft of my rules:

Turn Sequence
  1. Defensive fire - the TB takes fire from the defender
  2. Fire torpedo(es) - the TB may fire 1 or both torpedoes
  3. TB moves - the TB moves 1 space closer to the carrier
Defensive Fire
Range = 5-6     To Hit = 6
Range = 3-4     To Hit = 5-6
Range = 1-2     To Hit = 4-6

TB Damage
Roll

Area

Effect
1-2
Hull
Lose 1 hull
Enemy get +1 to hit
3
Engine
-1 mp
0 mp if 2 hits
4
Weapon
Lose 1 cannon
5
Hull
Lose 2 hull
Enemy gets +2 to hit
6
Destroyed
Eliminated

Torpedo Fire
To Hit - roll >= Range

Carrier Damage
2-6  Minor Damage - can be repaired in orbit
7-9  Major Damage - requires space dock repairs
10-11  Severe Damage - requires immediate departure from the system
12 - Crippled - if crippled again then ship is destroyed

I think I've got the rules covered. Which leads to point # 2:

2. I need a space carrier model
I thought about picking up some wood from Michael's to build a very basic ship, but I'll probably be too lazy tomorrow. Then I realized I have some spare cardboard so I can use it instead. Looks like I have a project for tomorrow.

Wednesday, January 1, 2014

What's in Store for 2014

Happy New Year!

Initially, I had planned to use this post to make some gaming-related New Year’s Resolutions. I even had a draft written up. At church on Sunday, the sermon was about “performance-ism” and how we measure our self-worth by how we perform. I realized that I was doing that with my gaming, which should be a fun diversion. So I have tossed out my resolutions. Instead of pressuring myself to perform I am just going to go with the flow and enjoy my hobby this year.

Nevertheless, I have some ideas on where I’m going with my gaming in 2014 and I would like to share.

Elder Scrolls
I have been sucked back into video games due to the excellent Elder Scrolls series. I recently started a new character for Skyrim and am in the midst of saving Tamriel. I am eagerly awaiting Elder Scrolls Online, which is coming out in April. Don’t expect many miniature updates that month!

Francesia
My intention when I began this blog was to play out battles in my mythical continent of Francesia. I ran a battle of the Grayrock Revolution before I got sidetracked. I’ve got the bug again for Francesia and am planning to complete the revolution.

Ultimately, I would like to collect complete armies for the major powers of the continent (Redgrave, Silverfern, Bluderia, Greenglade, Grayrock, and Drakendorf). That’s a lot of armies. My plan a year ago was to create the armies in 15mm using Malburian era figures but I’m now moving away from 15mm. I have 10mm Risk figures to use instead. I recently based a bunch and have already played a game (see my report on the Battle of Dardona). Nevertheless, I am sorely tempted to build the armies in 3mm.

I would also like to play some battles from Francesia’s medieval past (using Dux Brit as the campaign system). Again, I’d like to move away from the 15mm figures I picked up this year, but I haven’t decided on a scale. I’m considering either 6mm or 10mm.

Illustrate my RPG sessions
Currently, my RPG session reports are text only; I’d like to add some illustration. Using miniatures would be ideal, but I would need to purchase and paint them (and I am notoriously bad about painting). I’m toying with the idea of using paper miniatures. We’ll see where I go with this.

Anyway, I am looking forward to a lot more gaming fun in 2014 (in fact, I have a couple of reports to share already) and I wish you well in the new year.

Grayrock Revolution - Battle of Dardona

After months of delay, I finally played the 2nd battle of the Grayrock Revolution. I decided to use my Risk figures. I experimented with individual basing instead of the stands I used previously. Because I did not want to re-base my blue and gray figures unless I knew the experiment would work, I decided to use different colors for the opposing forces. The Bluderians would be represented by their Greenglade allies (in green, naturally). The revolutionaries would wear red (perhaps a donation from Redgrave) or yellow (which represents militia).

I made a few changes. For movement and combat rules, I used a modified version of the Command and Colors series, although I cut down the movement rates because I was using a smaller board. Infantry moved 1 space and could fire 3 spaces. Cavalry moved 2 spaces but could only battle if adjacent to the enemy. Artillery could move 1 space or fire 4 spaces.

As far as command, I used some homemade Risk Express dice and used the activation system described by Bob Cordery. Each side can roll 3 dice per turn.

In this scenario, the Grayrockian rebels move first. Victory is the first side to gain 5 flags (a side gains a flag by destroying an enemy unit. Also, the Grayrockians can earn a flag by taking the center town space).

And now for the Battle of Dardona!

Flushed with their success at Maraconi, the Grayrockian rebels placed the Sieur at their head and marched on the provincial capital of Dardona. The town was garrisoned by elements of the Greenglade army, which was subject to the King of Bluderia. But these were not the lukewarm recruits that succumbed to the rebels at Maraconi. Instead, the detachment was led by General Bartholomew Blackwell - known throughout Francesia as "Black Bart" for his ruthless and brutal nature.


The rebels (red and yellow) advance on Dardona.
The Sieur (white figure) is with the infantry.
 The Sieur pushed forward his enthusiastic infantry, but made two crucial mistakes. Persuaded by his advisers that he was crucial to the war effort and should not risk his person, the Sieur hung back instead of accompanying his troops. Also, the artillery got bogged down but the infantry did not wait. They would rue the lack of firepower when they assaulted the town's walls.


Grayrockian infantry pushes forward
 Battle began in the hills on the Grayrockian left flank. Greenglade's "Hardluck" Regiment (a play on their commander's name - Hadlock) fought with utter determination and valor. Faced with a regiment of regulars and two regiments of militia, it stood its ground.


A clash in the hills (left)
 Although nearly devastated, the "Hardlucks" wiped out the enemy regulars and a militia unit. Things looked better for the Grayrockians on the right as one of their cavalry units charged forward.


The Grayrockian advance on the left is blunted by a lone Greengladian infantry unit.
Meanwhile, the Grayrockian cavalry beats back enemy infantry.
 Numbers finally took their toll on the "Hardlucks" and they fell to the last militia unit while the rebel cavalry continued its assaults. Affairs were looking promising for the Grayrockians, but Black Bart still held the town.


The rebels secure the hills, but have lost 2 units.
Next, the Grayrockian infantry assaulted the town, only to be met by a hail of bullets and canister. Greenglade and Grayrock cavalry clashed on the left, with the advantage swinging to Grayrock

Grayrock's cavalry clears the right flank, but is stymied by the walls of the town.
The militia assaults the town (left).
 Unfortunately, the cavalry could not assault the walls of Dardona. Belatedly, the Grayrock artillery moved up to provide fire support while the infantry assault continued.


The militia is cut down by point-blank artillery.
Infantry in the center attacks.
The artillery support was too late; the infantry suffered dreadful casualties.
The frontal assault fails
 And the Greenglade artillery drove off the rebel cavalry.
Greenglade artillery fire scatters the cavalry.
At this point, with his army in tatters, the Sieur has no choice but to order a retreat back to Maraconi.

In the aftermath of the battle, some of the rebels would criticize the Sieur for not advancing with his infantry saying that his example could have heartened his troops and turned the tide of battle. Others argued that Dardona was too strongly defended; if the Sieur had joined the assault he may have ended up dead, which would have killed the cause.

The Sieur, realizing the limitations of age and the importance of his position, decided to step down as military commander. He would henceforth direct the rebellion from Maraconi. His nephew, the Esquire Giovanni, was appointed to lead the army.

Random Thoughts on Dardona

  • What a start to the new year - an actual miniature battle!
  • As mentioned in the battle report, I made two major mistakes as the Sieur. 
    • Before I pushed my infantry forward I should have waited to get my artillery into a position where it could provide fire support. I should have moved it onto the hill. From there, I could have bombarded the "Hardluck" Regiment in addition to the town.
    • The Sieur should have advanced with the infantry. The extra combat die could have turned the tide.
  • Figures and basing - I like the Risk figures; I think I will stick with them for a bit. Individual basing worked well.
  • Command & Colors - The C&C-inspired movement and combat rules worked well and produced an enjoyable game. I think it's going to be my preferred rules for Francesia.
  • Command Dice - they worked OK. At times, it was annoying not to be able to move cavalry or artillery. I am thinking of using a card system, however.
  • Battle Board notes
    • My board is half the size of the standard 13 x 9 C&C board, but it still worked out OK with the reduced movement rates. Still, I'd like an option to force march troops.
    • I was worried how a C&C-style game would work on a square grid rather than a hex grid, but everything seemed fine. My rules do not allow diagonal movement and ranges are counted orthogonally, but I intended to allow troops to retreat on the diagonal (the situation never came up, though).
  • New trees - I ditched my raggedy lichen trees and used trees from my Village in a Bag. I didn't mind the look (it looks very toy soldier-ish, which is the look I prefer), but their bases are very narrow so they tended to fall a lot. I may base them on pennies, or look for new trees.

Another Game Report - Zombies!

On New Year's Eve, our loud neighbors were out in force. They put me in mind of another type of mindless monstrosity:


So we decided to ring in the new year by trying to survive the zombie apocalypse. It was a tight race to the helipad, and the last seat out of danger.

All 3 of us are nearing the helipad, but the zombies are closing in.
Elizabeth prefers cooperative games so even though Zombies!!! is competitive she likes to play nicely. She will help other players by moving zombies away from them. I kept telling her that there was only 1 seat on the helicopter and if one of us beat her there she would be eaten by zombies. I encouraged her to do what I was doing - move zombies into her opponent's path.

Elizabeth and Jimmy in a race to the helicopter. But where am I?
She finally took my advice to heart.
Oh, there I am (the red piece) back at the town square!
Yep, she played a card that sent me back to the beginning. That's my girl!

Oh, Jimmy beat her to the helicopter and zombies ate her brains.